I'm pleased to announce that a healthy handful of crafts were sold at the craft fair at my company's operations center. From a rudimentary count: 3 scarves and 6 wallets sold. Not too bad for a first timer!
Vinyl Card Holder
This weekend I designed and sewed a vinyl card holder. I also pulled out my leather hide sitting in storage and tried that as well and both look very snazzy. I may need to tinker with the design a bit since both are very tight. I think I need to buy special glue to adhere to the back of vinyl to add a decorative fabric for the parts exposed.

Tentative future projects
I wouldn't mind doing these down the road:
Business card holder out of vinyl. Design incoming.
Leather wallet. May use Wallet 7.0 as the template.
Leave A Comment!
Have any suggestions for me, my website or hobbies I should take up? Let me know!
Updated To-Do List
I think I have 5 completed wallets 7.1 for the craft fair. I also created 5 boxes to sell them in. This weekend I want to:
Create 3 or 4 more wallets
Construct 3 or 4 more paper boxes
Create a handout/blurb for the wallet design for the sale explaining how to use the wallet
Create a label for the QR code to direct people to my website
Add unsold wallets to Etsy for sale
Take better pictures of the wallets for Etsy
***
As a side note, one of my colleagues who is beta testing wallet 7.1 REALLY loves the wallet.

Box 1.0
I designed, drew up the model and created a mockup of the wallet. The measurements are skewed to allow the tag inside the wallet (this was intentional so that it would add body and have my contact info). The template was designed on drawing paper, so it's pretty thin. I think I'll make the actual boxes out of bristol board or a similar card stock. The x's are all parts that should be cut out.

Box Template 6 4/8'' x 12''
With the template cut out and tabs made (this will need refining), I ended up using tape. Ultimately I'll use glue or another adhesive that won't show.

Box fully assembled.
I wanted the box to fit snug but still have some space in case the gifter wanted to have tissue paper to gussy it up a bit. The wallet can lay flatter but it naturally bulges out. The card insert gives it body and also contains my email address and website link.

Box with wallet and card insert.
Box design for wallet 7.1
First design for the box that will house the wallet 7.1 design. I gave the box about 1/8'' ease in every direction in case you wanted to add tissue paper. There will be light scoring, folding and hopefully minor gluing. Not sure about the type of paper I want to use but the measurement I need to cut out is 13 2/8'' x 5 4/8''. Bristol board may be the stiffest paper to use. I'll make a box out of drawing paper to see if it fits and then move to paper options later. I want to make a folded paper ring around the box so it stays shut and looks more professional. Will do that design later.

Wallet Pieces 7.1
I'm working on my workflow and cut out a bunch of the wallet 7.1 body pieces which I'll assemble in various stages. I am using basting tape to press down some parts that need top stitching. I need to cut the cash straps and use different colors but I may opt to streamline the decorate stitch with red or black. I can make it a thing!

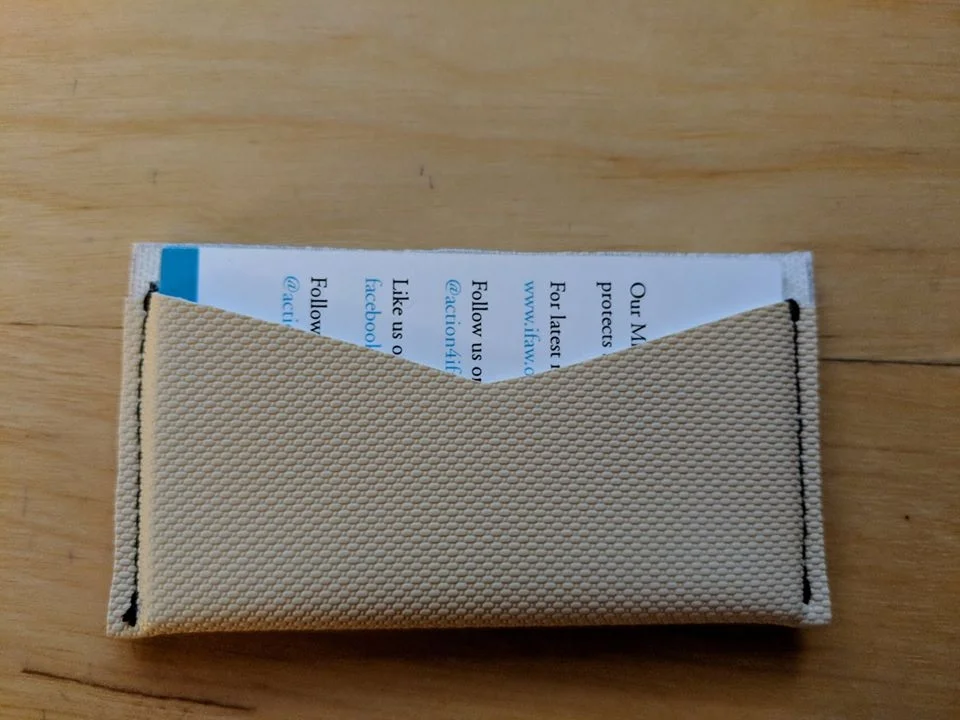
Wallet Template 7.0 and 7.1
Below is the wallet template with cash strap designs. There isn't a big difference between 7.0 and 7.1 except for the addition of a 2/8'' seam to hide raw edges. I'll see if I can make this into a printable free template.
When you trace this template, I would strongly suggest cutting inside the pen markings as it will give you the tightest fit for your cards. This template will hold 8-9 cards comfortably.
Wallet Fabric
I went to Joanns this week to pick up more vinyl fabric to make more wallets. They had the cool tire tread vinyl that I bought last time in black, gray and tan, but not in red. The red I got in a slightly thicker vinyl but it will do in a pinch. I'll be playing with contrasting colors and with contrasting colored thread in the not-too-far-future.
Basting tape should arrive today and that will allow me to sew down the raw edges. Doing so will mean that I will have to add 2/8'' to the length and 1/8" will be gobbled up in the seam allowance.
Going back to the honey-do list, I am drawing out the pattern multiple times on the fabric and will cut them all out at once to increase production. Also, I have started cutting inside the pen markings to make sure that the pattern measurement is true (and thus tight).
Below is a picture of wallet 7.0 with an accent color. When I get the basting tape and pattern modified, I will probably call that 7.1.
